How to filter a CMS collection on Webflow?

.avif)
.avif)
.avif)
.avif)
To increase your Webflow site's visibility on Google, you regularly write blog posts. However, their quantity is starting to grow, and it's becoming difficult to navigate them!
To overcome this problem, one of the most commonly adopted solutions is the use of filters. Thanks to this intuitive and popular sorting system, you can quickly find the article you're looking for.
There are many situations where using filters significantly improves the user experience (UX) on your site. All collections you might create, such as products on an e-commerce site, for example, benefit from being sortable.
However, Webflow does not have any pre-built solutions for implementing these essential filters. This tutorial will help you configure the CMS Filter attribute, a solution offered by Finsweet.
I. Why Add Filters?
Filters are primarily used to categorize items. Indeed, they offer users a more efficient way to access the information they are looking for.
Filters offer several advantages:
- Improved user experience for your site, which increases user retention and conversion. It also reduces your bounce rate.
- Improved accessibility to information : old articles are no longer hidden on the 8th page of your blog, as you simply need to use the appropriate filter to find them.
The two elements that almost always need to be sorted are products on an e-commerce site and blog articles.
As a reminder, the bounce rate is the percentage of users who leave your site after viewing only one page.
This is a negative signal for Google, which considers your site not engaging enough to retain user attention.
II. How to set up filters with CMS Filter?
CMS Filter is a solution developed by Finsweet, an expert in Webflow functionalities. This tool allows you to easily integrate a complete filter system into your Webflow site. This is done without adding a single line of code.
To integrate this solution into your Webflow project, follow these steps:
A. Integrate the filter script into your page
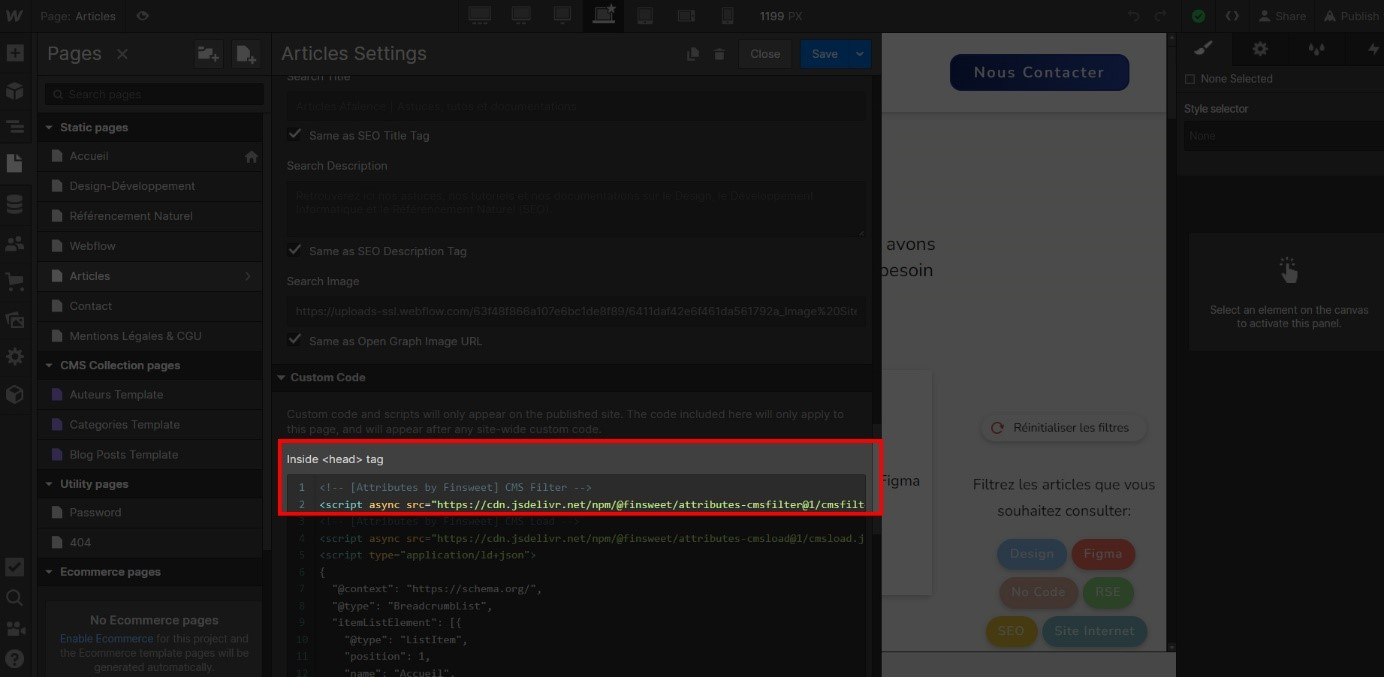
The first step is to integrate the Finsweet script into the page that will contain your filters.
To do this, copy the following script :
<!-- [Attributes by Finsweet] CMS Filter -->
<script async src="https://cdn.jsdelivr.net/npm/@finsweet/attributes-cmsfilter@1/cmsfilter.js"></script>
Then paste the script into the <header> section of your page.
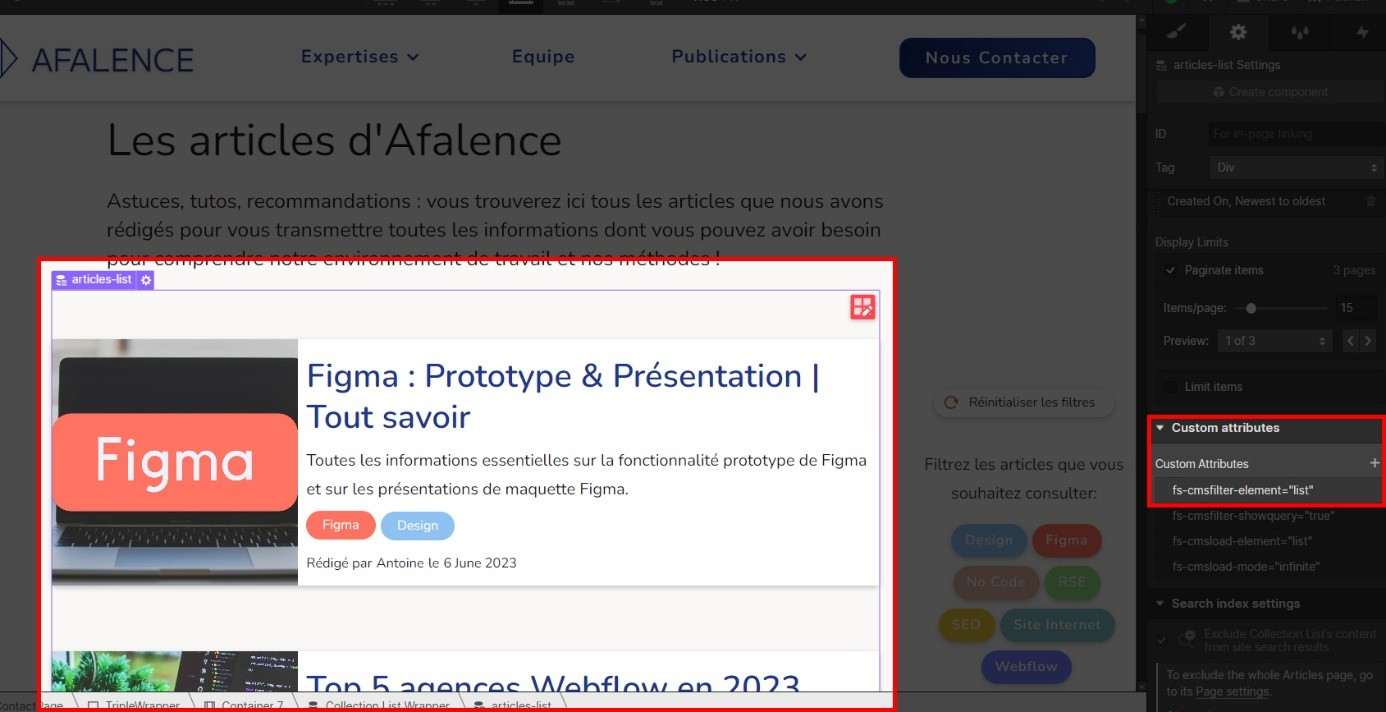
B. Define the list containing the items to be filtered
For the filter system to work correctly, you need to define 3 elements: a list, the filters, and the identification elements.
The list corresponds to the CMS Collection you wish to filter. To define it with CMS Filter, add the attribute:
[SEG 8]
fs-cmsfilter-element = list
the "Custom Attributes" section (settings shortcut: D key).
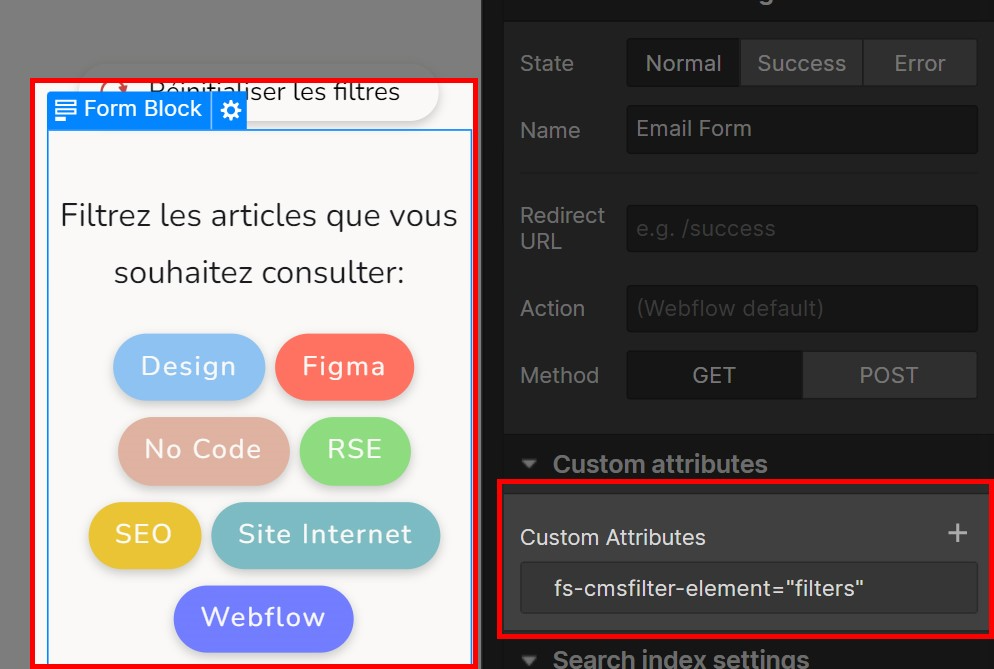
C. Define the form containing the filters
The filters
must be contained within a single form . Within this form, you can use the elements that suit you best: buttons, input fields, sliders…
To identify the form, add the following attribute to it:
fs-cmsfilter-element = filters
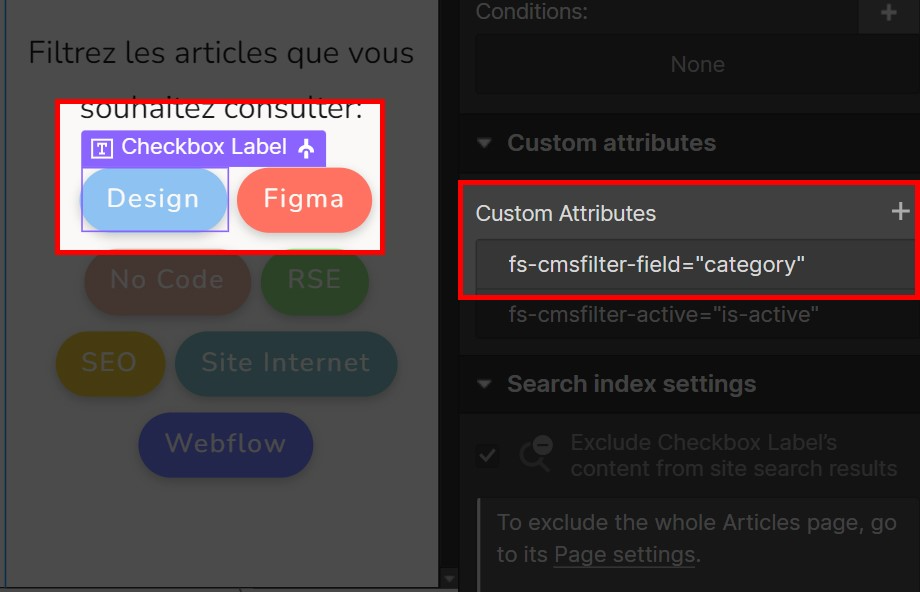
C. Define Identification Elements
Once the list of items to filter and the filters are defined, the identifications will link the list and the elements together.
For example, if you only want to see "red" items when you select the "red" filter, the identification element here is the color red.
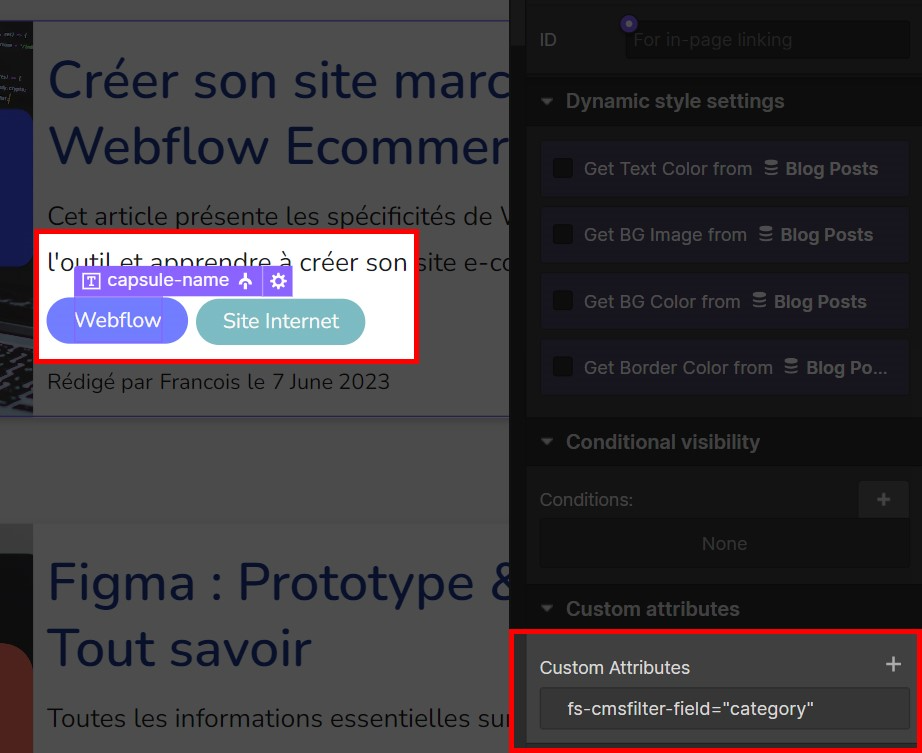
You must therefore add the identification attribute to the filter button label as well as to the text of the item to be filtered.
The attribute to add is:
fs-cmsfilter-field = IDENTIFIER
Here, IDENTIFIER is customizable to achieve a clearer result. For example, you can use fs-cmsfilter-field = color to use the same example.
III. How to customize filters with CMS Filter?
You now know how to configure the necessary elements to integrate a filter system into your Webflow site. Let's now explore the options to customize them to your liking!
- The Search Field attribute allows you to filter by text input. To do this, add the following attribute to your text input area.
fs-cmsfilter-field = IDENTIFIER
- The Clear attribute allows you to reset all filters with the help of a button. To do this, add the following attribute to the button that will be used for resetting.
fs-cmsfilter-element = clear
- The Items Count attribute allows you to display the total number of items in your CMS Collection. To do this, add the following attribute to the text area that will display the count.
fs-cmsfilter-element = items-count
- The Empty attribute allows you to customize the content displayed in the event of an empty query after filtering. To do this, add the following attribute to the "Div Block" that should be displayed in this case.
fs-cmsfilter-element = empty
This list presents our favorite attributes; however, many other options are available to you! We invite you to discover the complete list of attributes on Finsweet CMS Filter !
If you wish to expand your knowledge of Webflow, we encourage you to check out all of our Webflow tutorials!

See also our other articles
Let's discuss your needs
Are you looking for a web agency for your project? Contact us and find out how we can help you.