How to add features to your Webflow project using Javascript (JS)?

.avif)
.avif)
.avif)
.avif)
Webflow is a versatile no-code tool that offers many features.
It also comes with solutions for creating relatively complex interactions and animations.
However, to have complete creative freedom, it may be necessary to use custom code. Webflow is a modern tool that fully supports this.
Adding Javascript code to your Webflow project opens the door to countless features!
I. What is Javascript?
Javascript is a programming language primarily used for web development. Although it has Back-End capabilities, Javascript is primarily known and used for Front-End development.
Front-End development involves all the elements with which the user interacts. This includes mouse movements and clicks, scrolling, key presses, and button presses…
Javascript also allows for the addition of more complex interactive elements such as filters, search bars, moving elements...
Webflow allows you to add Javascript code without coding, thanks to its interactions tab.
By linking trigger elements to corresponding actions, Webflow translates your logic into Javascript code!
However, this simplicity comes with limitations in terms of flexibility.
To retain the benefits of no-code, we will introduce you to our preferred solution for adding Javascript elements without having to code them yourself: Finsweet.
II. Adding Javascript without coding: Finsweet
Finsweet offers to directly and exclusively on Webflow, features Javascript developed by experts. Thanks to its "Attributes" solutions, you can integrate many very practical options that will save you a lot of time.
Free and highly intuitive, each Finsweet module is documented and easy to set up.. Follow the tutorial to install the chosen feature. You can then customize it using the many available options.

Here is a non-exhaustive list of the modules we frequently use:
- CMS Filter : allows you to add a filter system to one of your CMS collections . We use it, in particular, to filter our blog posts.
- CMS Loader : this module optimizes the loading of your CMS items. Many options are available, such as the ability to load an entire CMS collection on a single page. We use it to load items upon mouse scroll.
- Powerful Rich Text : this module gives you the ability to add tags to your Rich Text. This allows you to make your Rich Text more flexible by defining classes that can be used repeatedly. For example, we use it to <span style="color: blue;" >add</span> <span style="color: red;" >color to</span> <span style="color: green;" >our</span> <span style="color: violet;" >paragraphs.</span>
- Table of Content : this module dynamically generates a table of contents for your CMS collection pages. The table of contents you can see at the top of this page is generated by this module.
We invite you to explore Finsweet's extensive module library to discover many more solutions!
If you haven't found the functionality you're looking for, you can also add your own Javascript code. Therefore, programming skills will be required here.
If you know how to write your own code, that's perfect: we explain below how to integrate Javascript code into Webflow.
II. How to integrate Javascript code into Webflow
To integrate Javascript code into Webflow, you must first code the script to be integrated into the tool.
Tip: to code basic functionalities, using Chat GPT can be enough to produce functional Javascript code without having to develop it yourself!
Once your script is coded, it's important to integrate it in the best place to optimize your site's performance.
Indeed, Javascript code can weigh down your page's source code, which lengthens its loading time and therefore negatively impacts its performance.
It is therefore essential that Javascript code is only placed on the pages it affects.
A. Integrating Javascript code across your entire Webflow site
If you want your script to be available across your entire Webflow site, you need to place your code in your project's <head> section.
Primarily use this option for general features such as cookie management or Google Analytics.
To access your project's <head>, go to your site settings, then to the "Custom Code" tab
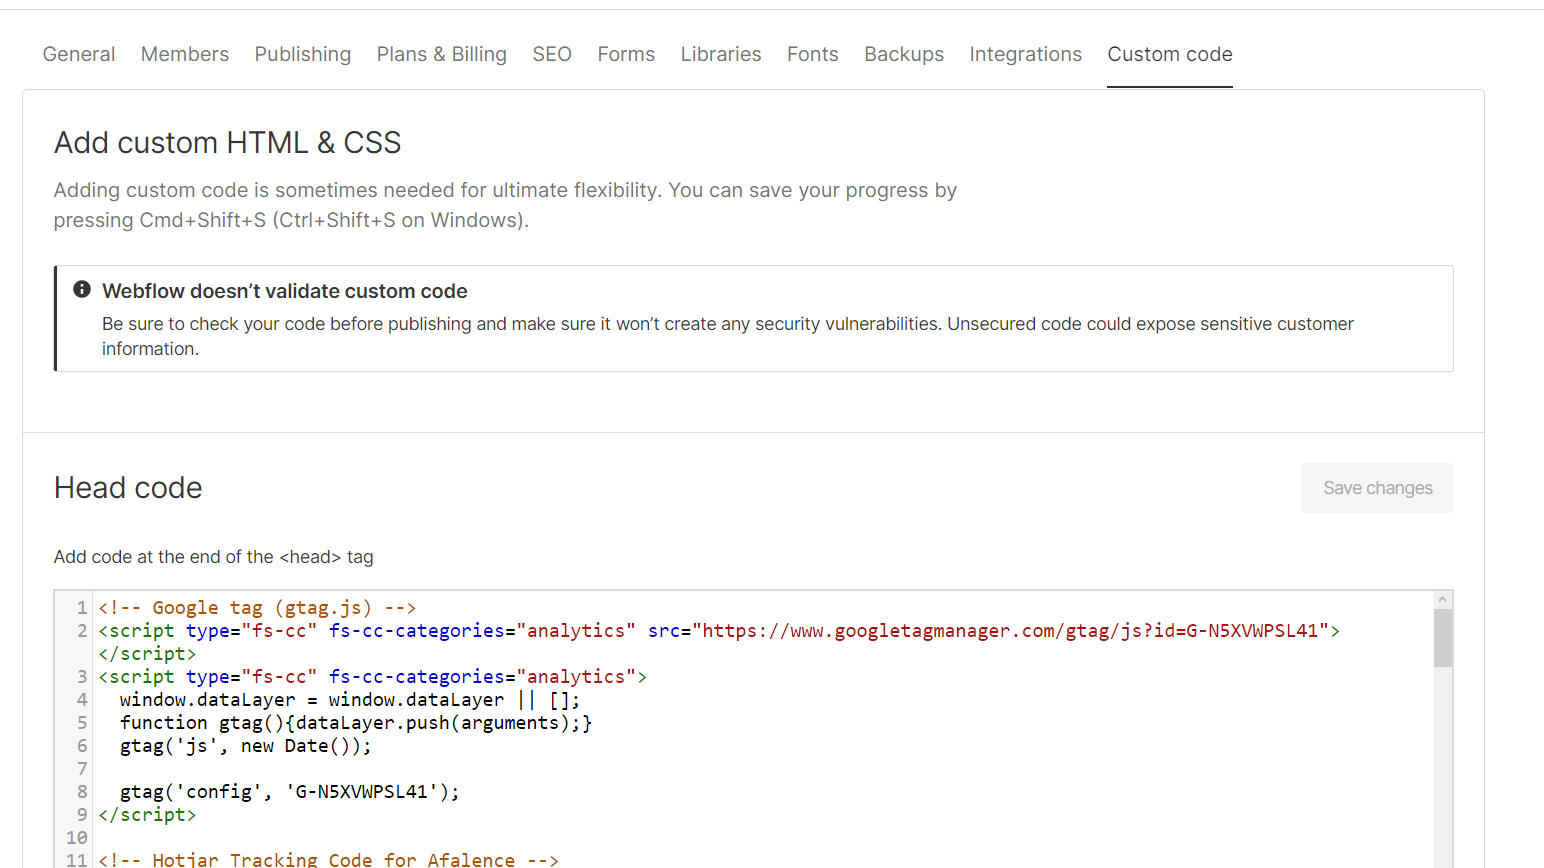
Add your scripts in the designated section, then click "Save" to save your changes. Then publish your project for the script to take effect on your live site.
B. Integrating Javascript code on a specific page of your Webflow site
If a feature is only present on a single page, it's best to add your script directly to that page.
For instance, a filter system that only appears on a blog page.
To do this, go to your page settings and add your script in the « Before </body> tag » section.

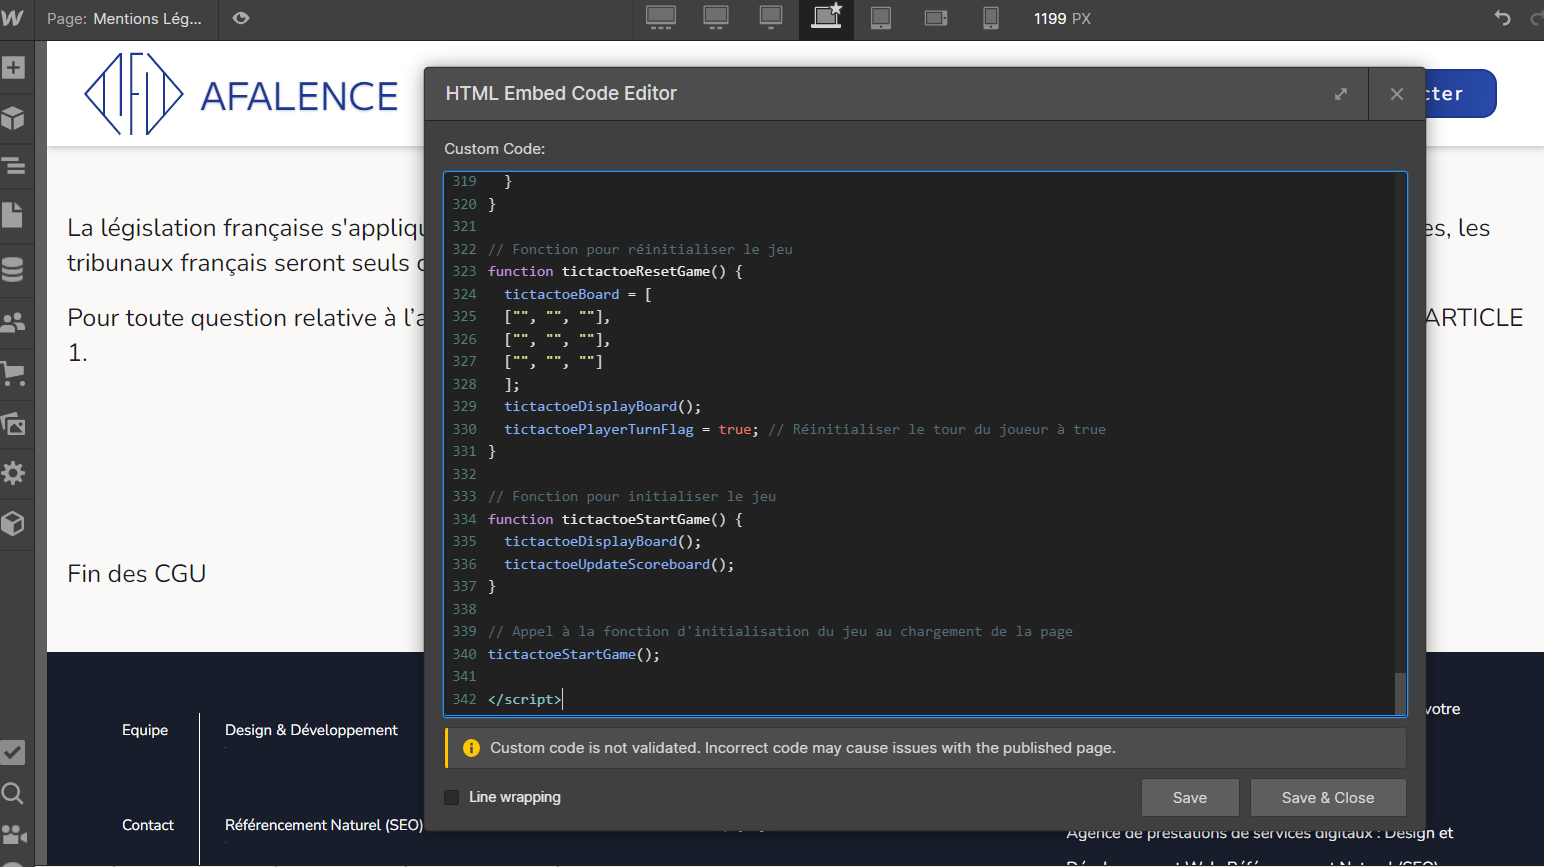
C. Embedding Javascript code in a specific location on a Webflow site page
If you want to be even more precise and embed a script in an exact location on a page of your Webflow site, you can embed your script within an HTML Embed.
This solution is recommended if the script refers to HTML content directly within the Embed.
As a reminder, an HTML Embed is a component that allows you to inject HTML, CSS, and Javascript code onto a Webflow page.
This allows you to add highly specific features, such as tables or games.
You now have the tools to add new features to your Webflow site, customize it, and further enhance the user experience!
If you'd like to learn more Webflow tips, we encourage you to check out our Webflow tutorials.
P.S.: If the last image in this article surprises you, it might be a clue to find a hidden element on this site... Happy hunting, curious minds!

See also our other articles
Let's discuss your needs
Are you looking for a web agency for your project? Contact us and find out how we can help you.