Complete Guide to Vectorizing in Figma

.avif)
.avif)
.avif)
.avif)
When working on digital creations, it's common to need to modify images and text.
However, it can sometimes prove complicated to modify text in as much detail as desired to create a logo, for example.
Similarly, a low-resolution image will generally lose a lot of sharpness when you enlarge it.
To overcome these difficulties, there is a format into which you can convert your text and graphic elements for easier manipulation: the vector format.In this article, we explain everything you need to know about the vector format. We then teach you how to vectorize your text and images in Figma.
I. General Information on Vector Elements
1. What is a vector element?
a. The different existing image formats
- The majority of the most frequently encountered image formats are so-called "raster" formats. This means that these visual elements are expressed in pixels. These include .png, .jpg, .jpeg, webp, .bmp, and .gif formats.
- The other most commonly used image format type is vector. This is more often used for any digital application. The most used and popular vector format is .svg (Scalable Vector Graphics). The .pdf format is also a vector format. Other vector formats exist, such as .eps or .ai.

b. Definition of a vector shape
A vector shape is a shape itself composed of several geometric shapes expressed as mathematical formulas.
This means it is made up of different figures, lines, and curves, all capable of adapting to any modification autonomously and proportionally. Each element and value that compose it can be modified independently or as a group.
c. Raster vs. Vector Elements
The main difference between raster and vector elements lies in their construction: a raster element is composed of pixels, while a vector element is composed of vector shapes.
This makes raster elements more suitable when many color nuances are required : each pixel takes on the necessary shade, and the whole produces a gradient. The disadvantage is that pixels cannot be scaled or adapted to the image size.
Conversely, vector elements are perfectly malleable and flexible because vectors retain their properties and constantly adapt to external factors. A vector element, however, is limited to a simple use of colors, as it cannot adapt them based on changes in shape and size.
2. What are the advantages of vector elements?
a. Modifying a Vector Element
The fact that a vector element can be easily modified offers many advantages:
- Changing the proportion of one of the components of a vector shape is very easy and allows you to alter only the desired part without affecting the whole.
- Modifying the size of the element significantly is easy and maintains the best possible resolution.
- Removing or dissociating certain parts of a vector element is also made easier by the vector format.
b. Common Uses of Vector Elements
Here are some of the most common uses for vectorized elements:
- Logo creation and modification
- Textile printing
- Creation of images for internet use or in various sizes and configurations (posters, flyers, etc.)
- Cartography
- 2D animation and 2D video games
- Clip Art and Vector Art
Now that you have a good overview of what a vector element is, its advantages, and its most common uses, let's learn how to vectorize in Figma.
II. Vectorizing in Figma
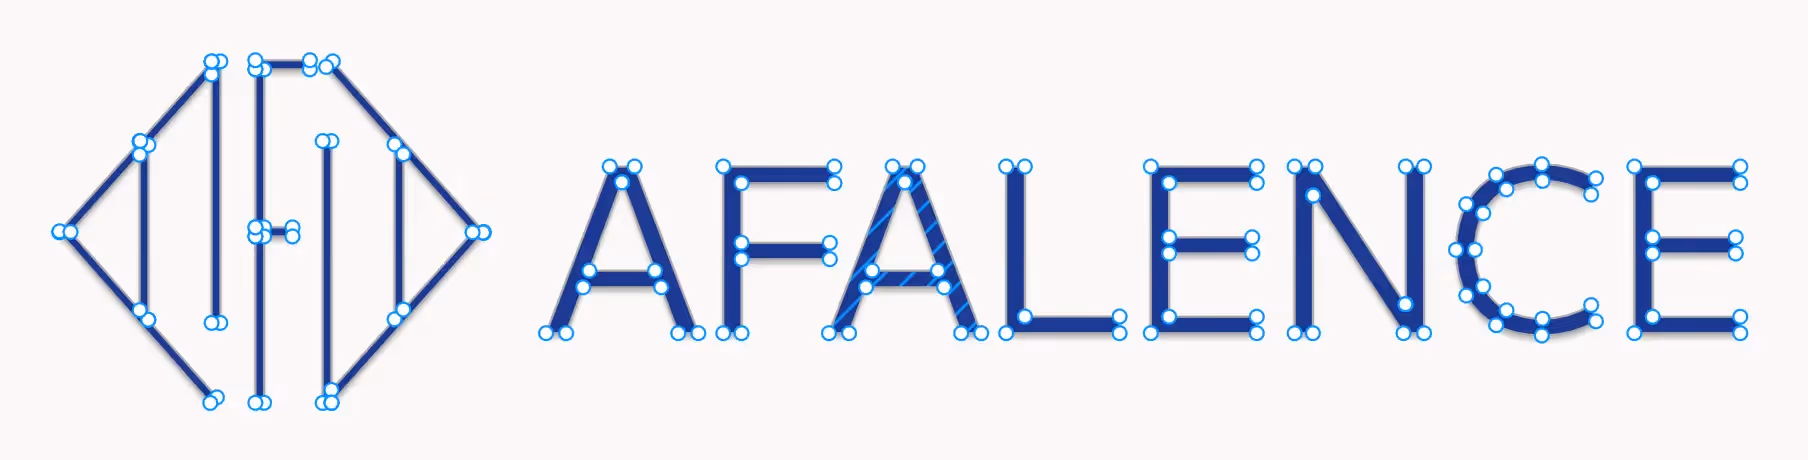
1. Vectoriser du texte sur Figma
Etape 1 : Sélectionner le groupe texte à vectoriser.
Etape 2 : Deux options s’offrent à vous :
- Utiliser la fonction « Flatten », accessible depuis les différents menus ou grâce au raccourci Command / Ctrl + E.
Vous obtenez ainsi un vecteur composé de l’ensemble de vos lettres.

- Utiliser la fonction « Outline Stroke », accessible depuis les différents menus ou grâce au raccourci Command / Ctrl + Shift + O.
Chacune de vos lettres est alors définie par son contour, donc par les vecteurs qui l’entourent.

Etape 3 : Profiter de votre texte vectorisé.
Un double-clic sur le groupe texte vous permet de le modifier autant que vous le souhaitez. Maintenant que votre texte est vectorisé, vous pouvez modifier la forme de n’importe quelle lettre sans impact sur les autres lettres.
Vous pouvez également l’inclure à un logo afin que la taille du texte s’adapte à toutes les modifications de taille du logo sans avoir à changer la taille de police à répétition.
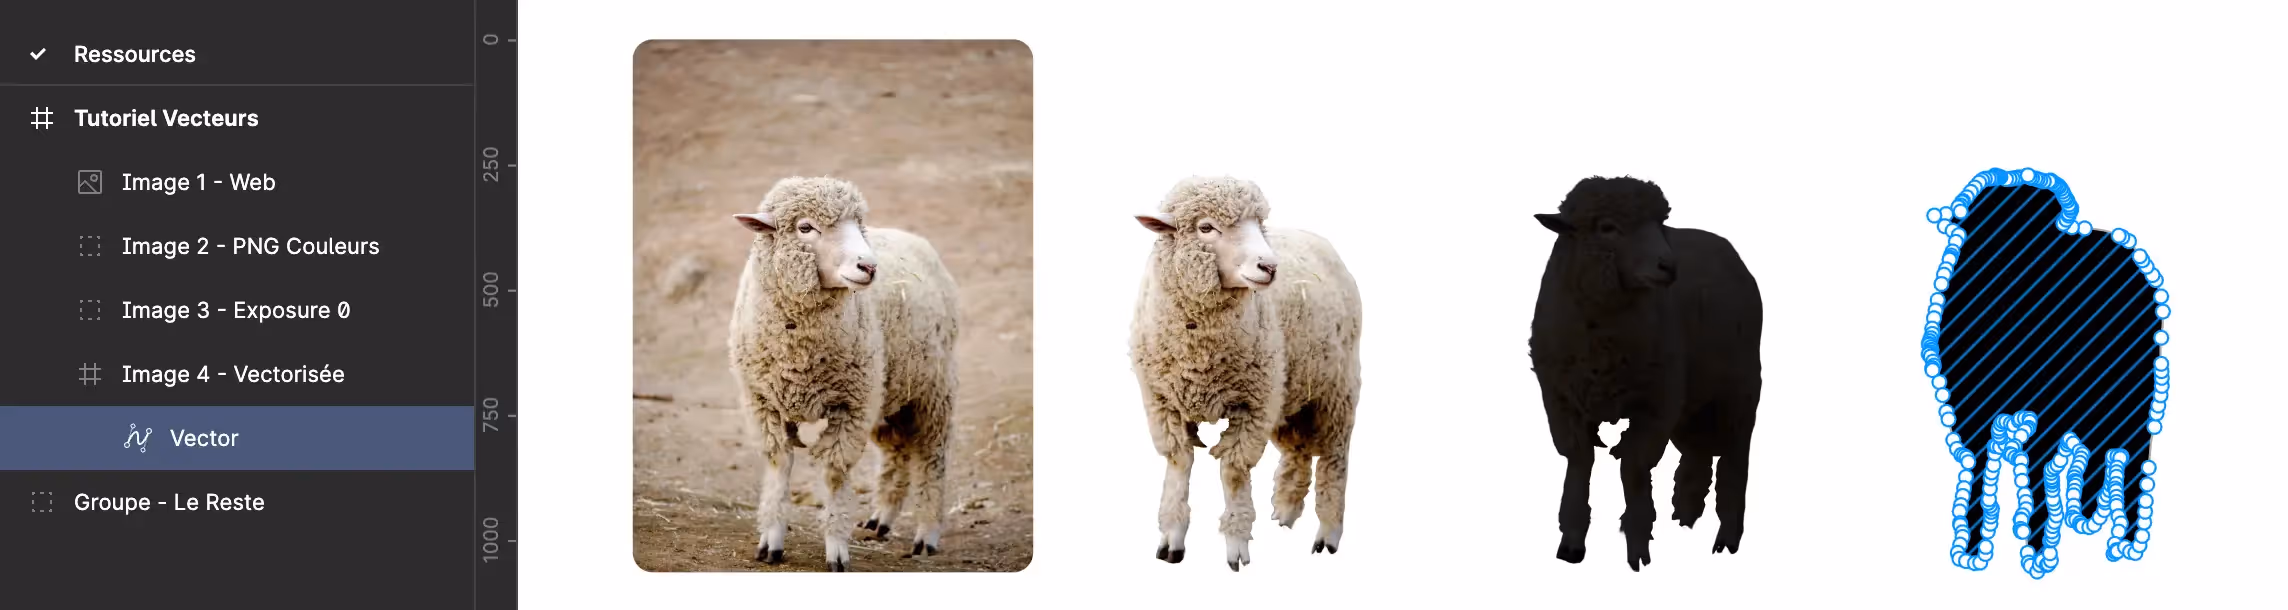
2. Vectoriser une image sur Figma
Afin de vectoriser une image sur Figma, il est tout d’abord nécessaire de télécharger cette dernière et de l’intégrer à une frame d’un de vos projets Figma.
Astuce : Nous vous recommandons de télécharger votre image dans la meilleure résolution possible afin de faciliter votre travail sur cette dernière.
Une fois que votre image est dans votre projet Figma, deux méthodes s’offrent à vous pour la vectoriser :
Méthode 1 :
Vectoriser l’image soi-même. Cette méthode consiste tout simplement à reproduire manuellement le dessin importé avec des formes et courbes afin d’en créer une version vectorielle. Bien que très performante, cette option est très chronophage pour arriver à un résultat de qualité. Le fait de créer avec des formes simples ne demande pas de savoir dessiner.

Méthode 2 :
Utiliser un plugin pour vectoriser votre image. Vectorize et Image Tracer sont deux plugins gratuits auxquels vous avez accès directement depuis votre espace de travail Figma. Attention, il faudra souscrire à une version payante pour pouvoir les utiliser.
Pour vectoriser gratuitement votre PNG, nous vous proposons d'utiliser Convertio.
Astuce : Si vous avez besoin d’informations ou conseils pour utiliser un plugin, lisez notre article sur l’utilisation des plugins sur Figma.
Ces plugins permettent de vectoriser le contour d’une image noire sur fond blanc. Voici un tutoriel avec les différentes étapes à suivre pour convertir une image JPG en dessin vectoriel :
- Chargez votre image dans Figma.
- Enlevez le fond d’écran (s’il y en a un) grâce à un plugin (Remove Background) ou une application digitale (Picwish).
- Ajustez ensuite l'opacité de votre image détourée afin d'obtenir un fort contraste entre l'image et le fond. Vous pouvez utiliser la fonctionnalité "Exposure" sur Figma, ou jouer sur le "treshold" dans les plugins lancés.
- Une fois que votre dessin est isolé du fond, lancez votre plugin de détourage ou chargez votre PNG dans convertio afin d’en faire un dessin vectoriel.
Félicitations, vous avez vectorisé l’élément dont vous aviez besoin !
III. Questions Fréquentes
Qu’est-ce que le format SVG ?
Le format SVG est le type de format le plus utilisé pour les éléments vectoriels. Il est le format de référence pour la création, la sauvegarde et le partage de visuels vectoriels.
Pourquoi utiliser des éléments vectoriels ?
Il est préférable d’utiliser le format vectoriel pour tous les éléments graphiques que vous pouvez être amené à utiliser à plusieurs reprises, à modifier ou encore à partager avec d’autres équipes de travail digitales.
Ce format est malléable et peut donc s’adapter à toutes tailles d’écrans digitaux. Il est le format de prédilection des designers et développeurs.
What are the disadvantages of vector elements?
Managing colors for a vector element can be less convenient than with raster image formats. This is because it is more difficult to incorporate color gradients into SVG files.
Since each element that makes up a vector shape is defined by specific properties, it's contradictory to include color variations, which would be a dynamic property.
What is the difference between a vector image and a raster image?
A vector image is expressed in vectors, which means it is much easier to modify or split. This image easily adapts to size changes, but its colors are fixed.
A raster file is expressed in pixels, meaning it can have a wide range of colors. However, when this file is resized, it can become blurry.
Why use vector graphics in a logo?
A logo is a visual element that typically has many variations depending on its intended use: classic version, extended, wordmark, print logo, eco-logo, version with a tagline…
It is therefore important to have a logo that is easy to modify, both in its components, size, and their arrangement. Furthermore, it is rare and unconventional for a logo to consist of more than 2 or 3 colors, which is ideal for using vector shapes.

You now have all the necessary information to understand and use vector files. You also know how to vectorize text or a drawing using Figma.
To delve deeper into using Figma, we recommend you check out our article on essential Figma plugins.
If you are currently working on a logo, brand guide, or website project, you can also check out our articles on the topic or contact us to discuss it directly with us!

See also our other articles
Let's discuss your needs
Are you looking for a web agency for your project? Contact us and find out how we can help you.