All about image management in Figma

.avif)
.avif)
.avif)
.avif)
In recent years, Figma has become the new go-to tool for design.
Among all the features it offers is the ability to easily import, convert, export, and edit images. Working with images is so straightforward that using Photoshop has become optional for a designer working in Figma.
Here are all our tips for effectively using and working with images in Figma.

I. Importing Images into Figma
1. Importing a Personal Image
To import an image you own into Figma, you just need to drag and drop it from your desktop into Figma. It will then appear in your workspace.
Tip: If a frame or shape is selected when you drag and drop, the imported image will adapt to it and fill it.
You can also copy the image and then paste it directly into Figma.
Reminder: copy shortcut: Ctrl / Command +C
paste shortcut: Ctrl / Command + V
Finally, you can import an image from any file on your computer by following these steps:
Menu "F" -> File -> Place Image
Tip: The keyboard shortcut for this action is: Shift + Ctrl / Command + K.

2. Importing images from the internet
First, we recommend ensuring an image is royalty-free before importing it from the internet. Contact or credit the image's author if it is not.
Tip: Istock, Adobe Stock, Unsplash, and Getty Images are royalty-free image libraries. Unsplash is the only one of the four that offers a free, albeit more limited, version.
Once you've found the image you want to import, download it to your computer by right-clicking and selecting "Save As...".. This allows you to rename it and place it wherever you like.
You can then proceed as described in the first step to import the image from your computer into Figma.

3. Importing images using plugins
Some plugins, such as the Unsplash plugin, for example, give you direct access to images within Figma. This saves you from repeatedly searching for images online and can save you a lot of time when creating your mockups.
If you need it, we have written an article that summarizes everything you need to know about Figma plugins and an article that explains how to use a Figma plugin.

II. Convert Images in Figma
1. Using Images Effectively in Figma
- First, remember to rename the images you import into Figma so that your entire team can easily find and differentiate them.
- Also, remember to keep a version of each image at the highest possible resolution in your dedicated resources area.
Tip: Hold down the "Shift" key to resize an image while maintaining its original proportions.
Figma offers many options for working with images directly within the tool. Simply double-click on the image to open the editing menu. This allows you to adjust shadows and other texture or contrast effects.
For more in-depth image editing, you can use various plugins. Remove BG is a plugin that allows you to easily and quickly cut out an image to remove its background.

2. Changing an image format in Figma
The simplest way to change an image's format in Figma is to use the dedicated plugin. For example, you can easily convert JPG images to PNG format.
You can also, and most importantly, convert images to SVG format using plugins like Image Tracer.

Note: SVG is a vector format that maintains excellent image quality regardless of any size changes. This format is very popular and preferred for software development.
Tip: If you don't need a vector image, we strongly recommend converting your images to WebP format before integrating them into your website. To do this, you can use the free website Squoosh.app.
III. Exporting Images from Figma
1. Create a group representing the image to be exported
Any element created in Figma can be exported as an image. As such, you can export an image you've worked on or create a visual element composed of various components and then export it as an image.
To do this, we recommend that you work on large elements to achieve the best possible resolution. The ideal image width is 2,400 pixels. Depending on the height of the image you are creating, 1,600 pixels or 1,008 pixels are good sizes.

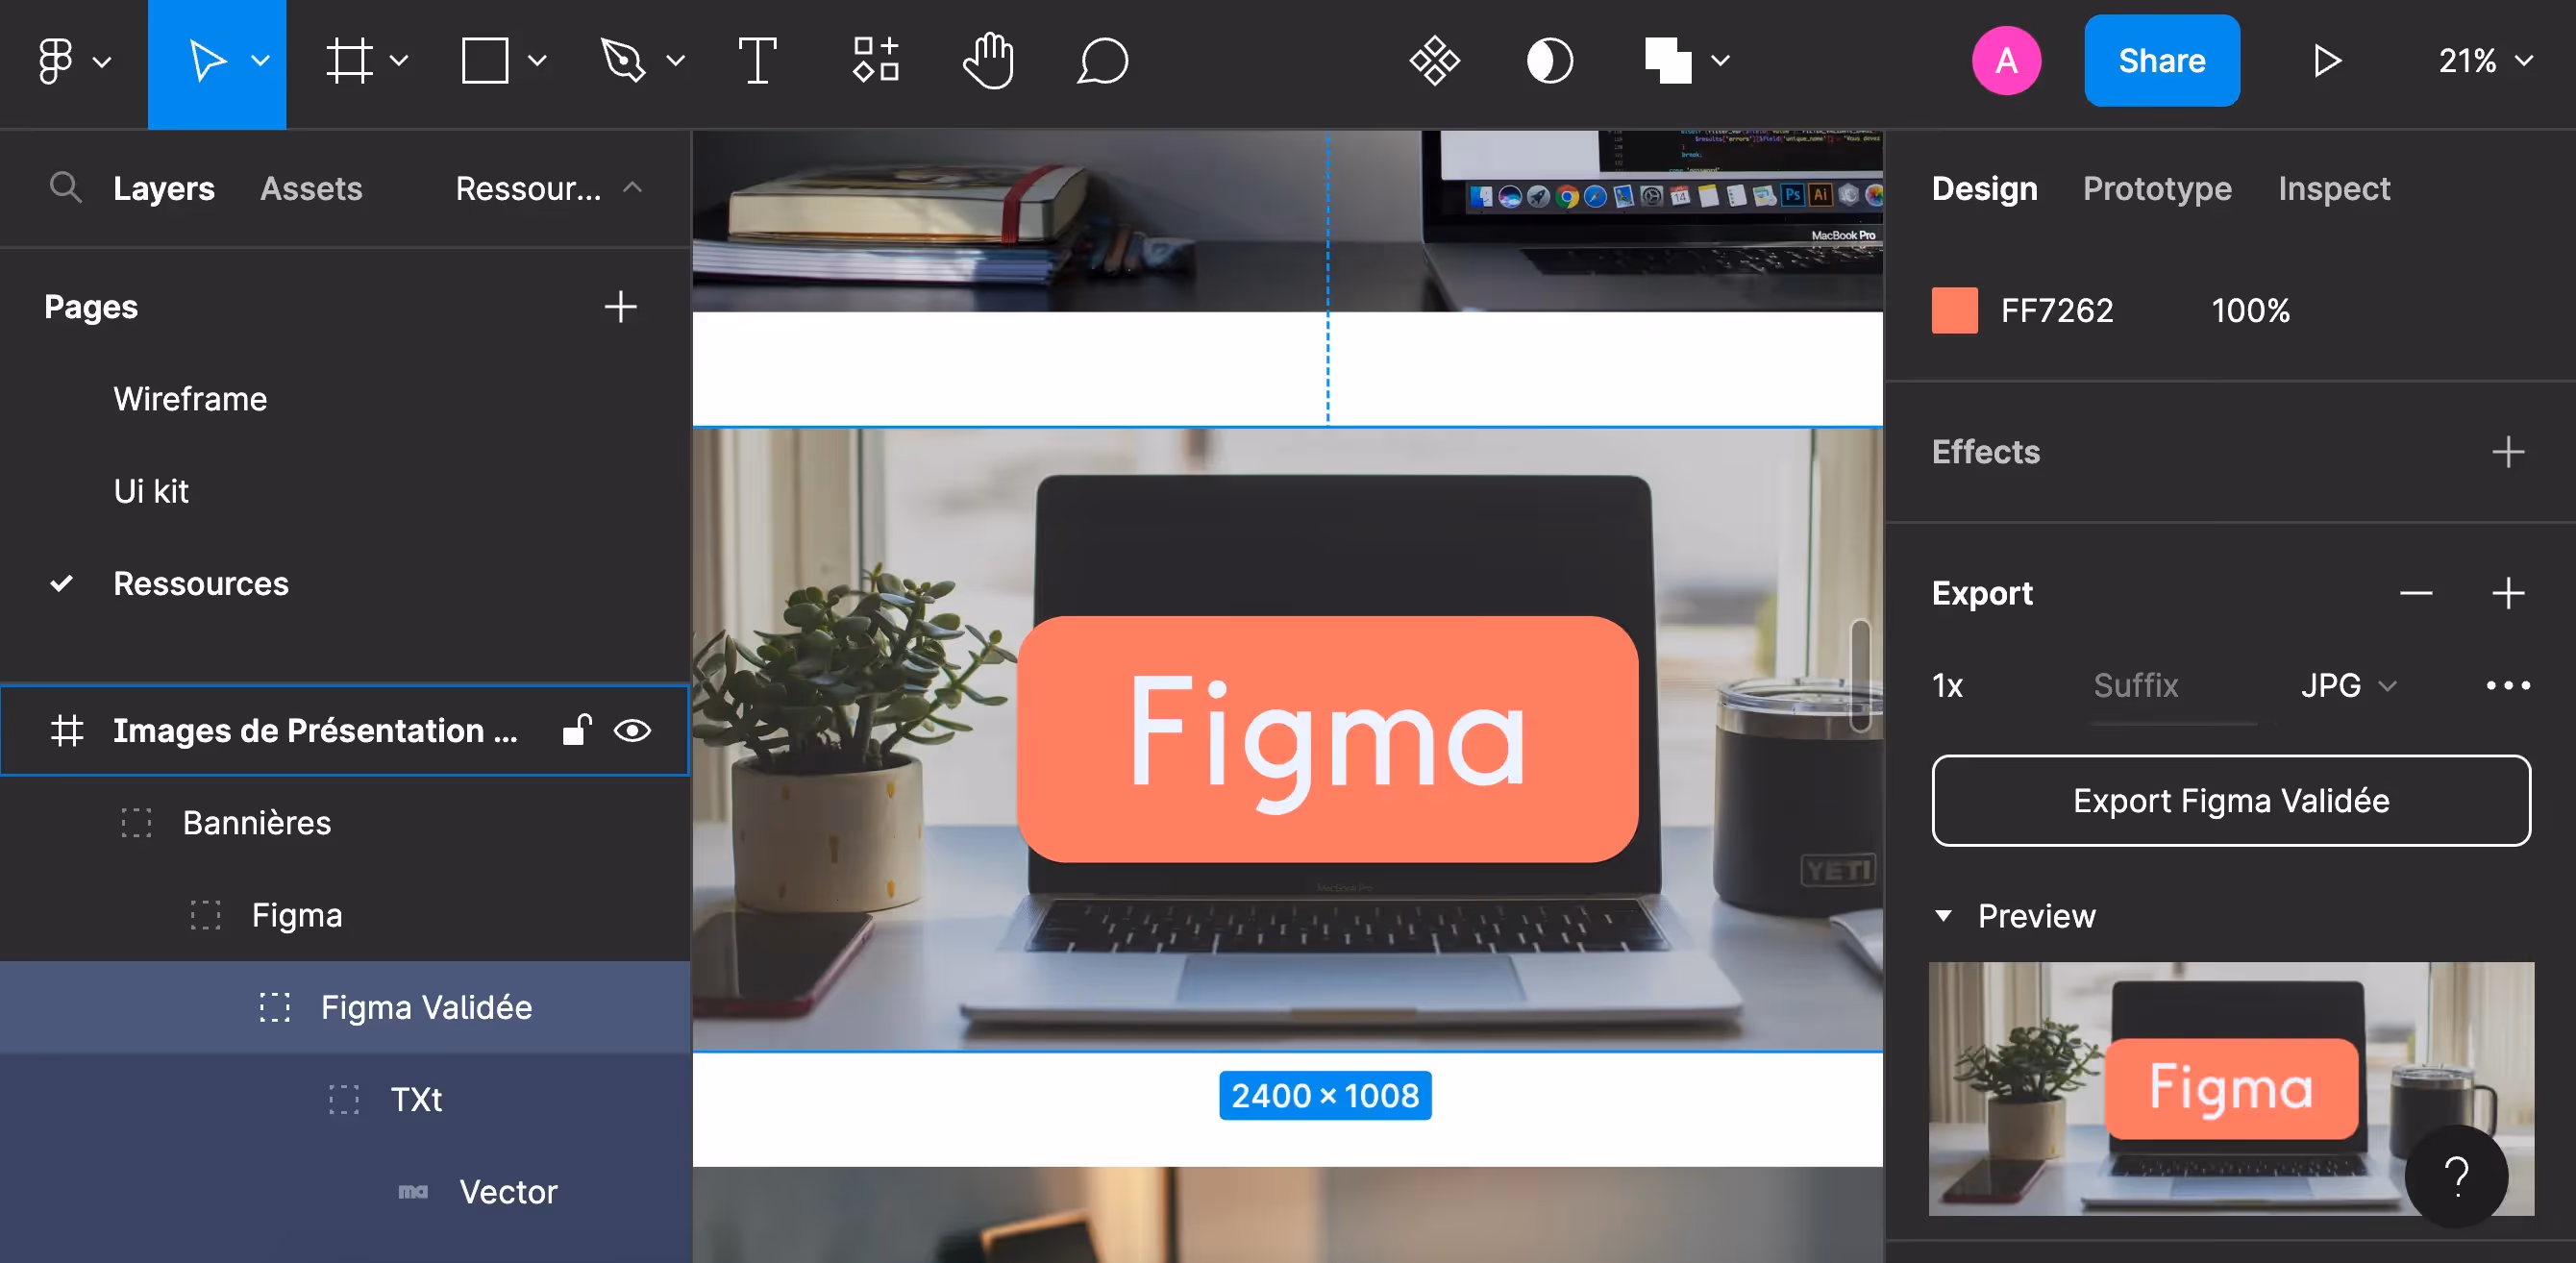
2. Export the image from Figma
To export the element as an image, follow these steps :
- Select only the element
- Go to the "Design" tab in the toolbar on the right side of the screen
- Scroll down the tab to the "Export" section
- Select the desired image format
- Click the button below: "Export Your Element Name"
The image is then downloaded directly to your computer. We recommend naming it and placing it in a dedicated location on your device.
Tip: For a good resolution image, we recommend exporting as JPG, then compressing it to WebP using Squoosh.
Tip: You can view the image preview by clicking on "Preview" below
IV. Frequently Asked Questions
1. Why convert images?
The act of converting an image allows you to obtain it in a suitable format for its intended use.
2. What is the best image format?
The best image format depends on its intended use. Here are the advantages of the 4 most commonly used formats:
- JPG is the standard high-definition format
- PNG is a format that supports 'transparent' elements within an image
- SVG is a vector format, ideal for images whose size and shape need to be adaptable
- WebP is a format that significantly compresses images while maintaining their quality
3. What is the difference between an SVG image and a PNG image?
The PNG format differs from JPG only in its ability to preserve transparent elements. The SVG format also does this. An SVG image is vector-based. This means it is composed of countless vectors that adapt to all changes in the image's size and shape to maintain its quality.
4. What is the difference between JPG and JPEG formats?
JPG and JPEG are two names for the same image format. Today, we mainly refer to the JPG format. The JPEG designation has become obsolete.

You now know the essentials about using images in Figma! You can find other articles about the tool through our filtered page on Figma.

See also our other articles
Let's discuss your needs
Are you looking for a web agency for your project? Contact us and find out how we can help you.