Tutorial: How to Use GSAP to Create Animations on Webflow

.avif)
.avif)
.avif)
.avif)
If you want to create sophisticated animations on Webflow, you might find yourself limited by the animation editor's constraints. GSAP is the tool you need!
GSAP is a tool that offers high precision and unlimited options for creating complex animations. Furthermore, these animations won't overload your pages as they offer excellent loading speed performance.
GSAP is a JavaScript library. Using this library correctly therefore requires a basic understanding of this development language.
If you use Webflow, you're probably more comfortable with no-code tools. So, we're presenting a solution from Refokus to integrate GSAP animations, without needing to code!
I. What is GSAP?
Green Sock Animation Platform (GSAP) is a JavaScript library that allows you to create advanced animations.
GSAP has established itself over the last 10 years as a leader in animation due to its speed and reliability. Today, over 11 million websites use GSAP for their animations.
Animations and the use of GSAP are now a major asset in an environment where it's becoming increasingly difficult to gain visibility and stand out from the competition. Creative freedom is limitless!
There are many advantages to using GSAP animations over Webflow's:
· Faster to create : once you're familiar with the library, it's significantly faster to set up an animation with GSAP than with the tools available on Webflow
· More precision : Webflow's animation creation tool can be finicky with animation sequencing, whereas GSAP is extremely efficient.
· More options : GSAP can interact with all elements on your web page, whereas Webflow currently has limitations in this regard.
GSAP is therefore the ideal tool for creating sophisticated and complex animations!
II. How does GSAP work?
This section presents how GSAP works and its JavaScript structure. If you are exclusively a no-code Webflow developer, we invite you to go directly to the section III. How to add GSAP animations to Webflow !
To be precise and functional, a GSAP animation is divided into 3 elements.
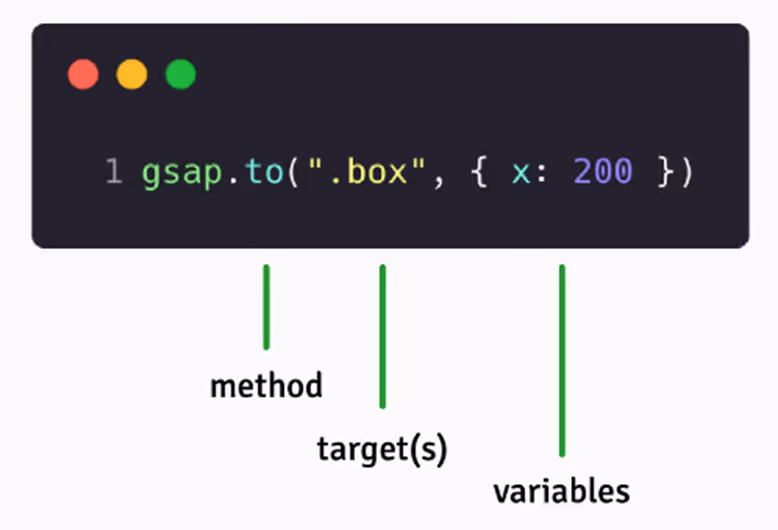
A. The Method
The method represents the action that will be performed. The method is the first element to specify when creating a GSAP animation. For instance, the example above uses the "gsap.to" method.
There are many different methods. Here are the 4 most common:
· gsap.to () : the element targeted by this method moves to a new position. Many options can be added to customize the movement: speed, rotation, color change...
· gsap.from () : the inverse of gsap.to. This method allows moving an element from a specified position. Similar options are applicable.
· gsap.fromTo () : this method combines the two previous ones. You can thus specify a starting point and an ending point for the element you are animating.
· gsap.set () : this method places the targeted element in a new position, similar to gsap.to. However, this method performs the movement instantly.
We invite you to read the GSAP documentation to explore the full range of available methods!
B. The Target
The target, also called "target", is the second element of a GSAP animation. In the provided example, the target is ".box".
Under the hood, GSAP uses a method so that every element on your page can be selected. Any element with a class or an ID can therefore be your target!
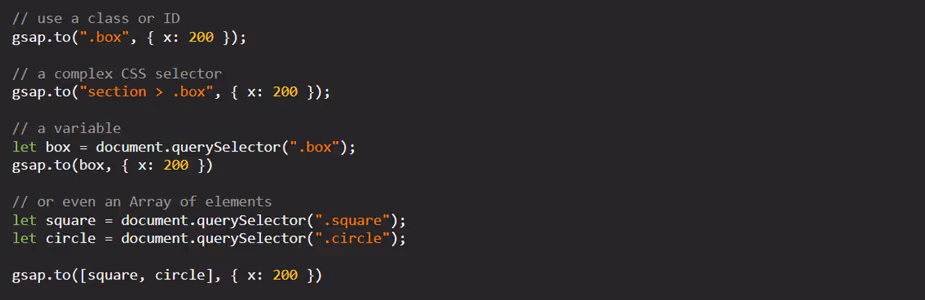
You can define your targets in various ways:
· Selecting a class or an ID
· Using a more complex CSS selector
· Defining a variable that contains your target element
· Defining an Array of all your target elements.
C. Variables
Variables are the parameters of your animation that allow you to customize and configure your method as you wish. They constitute the 3rd element of your GSAP animation.
You can therefore choose and define the distance, the axis of rotation, the duration, and so on.

In the example shown, we find 3 variables:
· x : 200, this variable indicates on which axis the target should move (x-axis) and by how many pixels (200)
· rotation : 360, this variable indicates that the target will complete a full rotation (360 degrees)
· duration : 2, this variable indicates that the animation will last 2 seconds.
Here is a non-exhaustive list of available GSAP variables, along with their CSS equivalent and an explanation of their action.
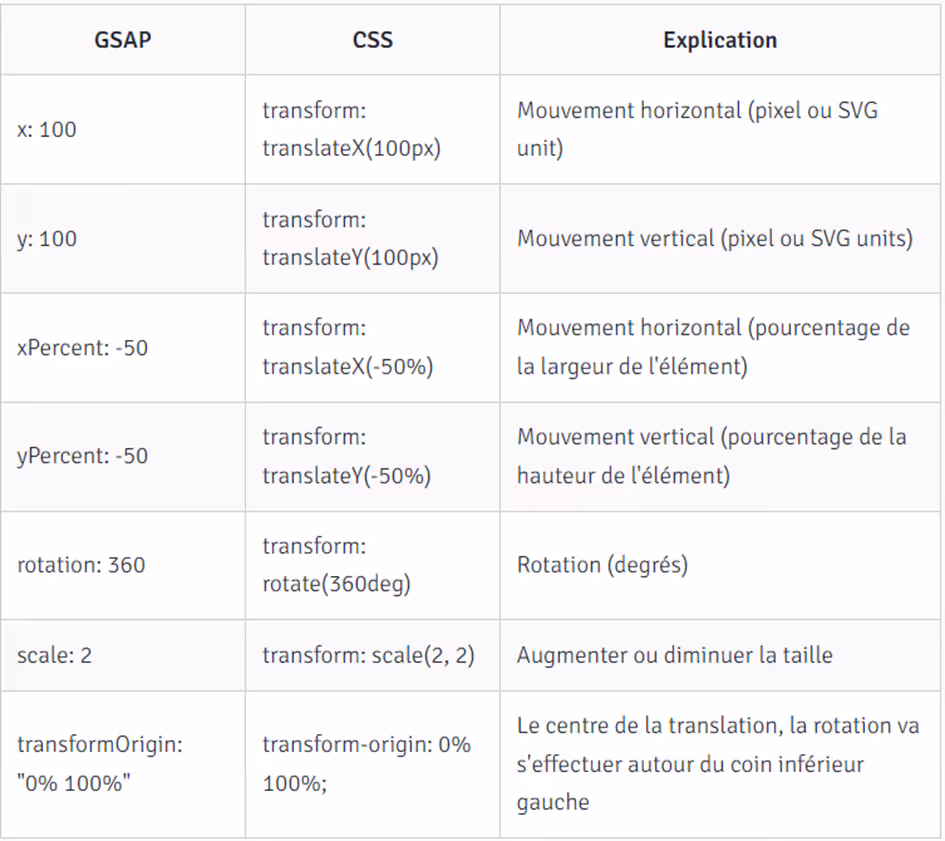
To find all available variables, we invite you to consult the GSAP documentation.
III. How to add GSAP animations to Webflow?
For No-code enthusiasts, Refokus offers a free tool that allows you to integrate GSAP animations into Webflow, without coding!
However, this tool only allows you to add these animations to your text. Currently, it is necessary to know how to use Javascript to leverage GSAP to its full potential on all elements of your site.
For configuring advanced text animations, GSAP-text-animator offers a user-friendly visual interface.
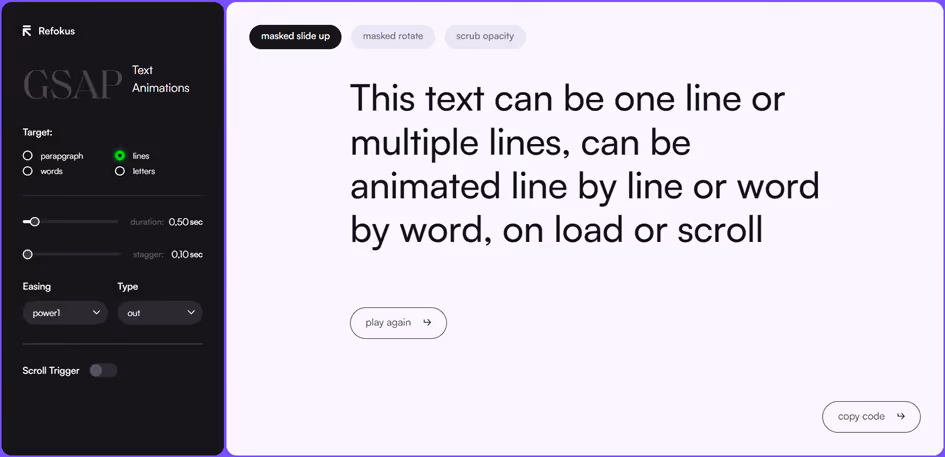
A. Choosing the animation
This tool offers 3 different animations, selectable from the header options.
· masked slide up : this animation makes your text appear with a bottom-to-top movement.
· masked rotate : this animation makes your text appear with a rotation effect.
· Scrub opacity : transparent by default, your text becomes opaque during the animation.
B. Customization Options
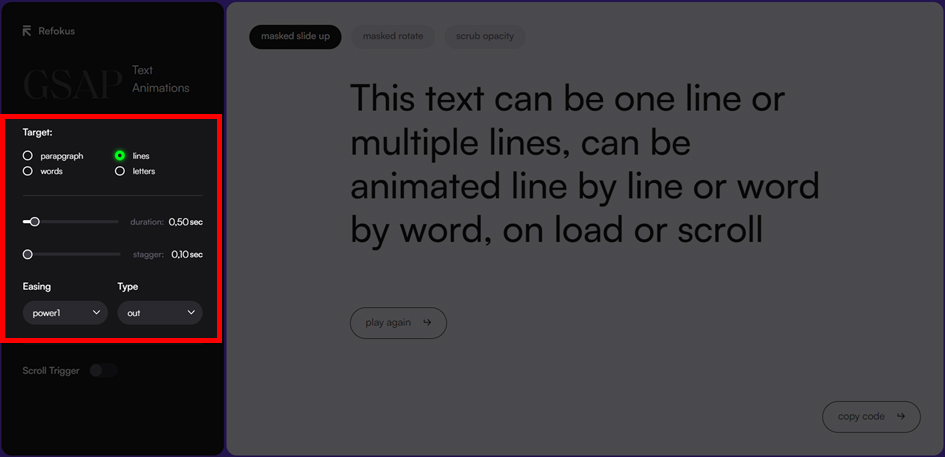
To fine-tune these animations, the left panel contains numerous settings.
The « Target » refers to the elements affected by the animation. You can choose to trigger the animation paragraph by paragraph, word by word, or even letter by letter.
The « Duration » refers to the length of the animation. This duration determines the time, in seconds, elapsed between the start and end of each element's animation.
“Stagger” refers to the time elapsed between the animation of each element. To create a smooth effect, words trigger their animation in sequence. The time separating each of these animations is the “stagger”.
“Easing” and “type” allow you to configure the animation's execution speed. Thus, if this option is set to “ease in,” the animation starts slower then accelerates as it progresses.
C. Selecting a Trigger
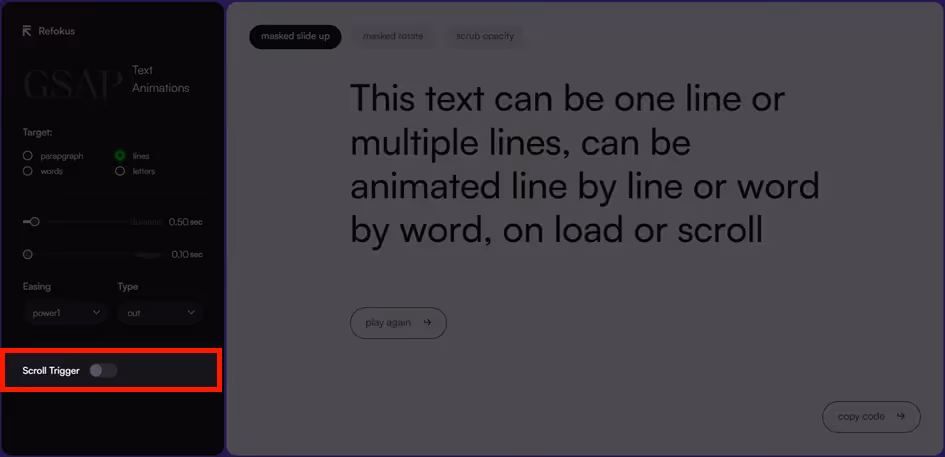
By default, your GSAP animation is triggered when the animated text is displayed on screen. If your “duration” is 2 seconds, the animation's length is proportional to the number of elements to display.
The “Scroll Trigger” button allows you to link the animation to the user's scroll. Thus, the animation no longer has a fixed duration, but unfolds in parallel with the user's navigation.
D. Integrating the animation into Webflow
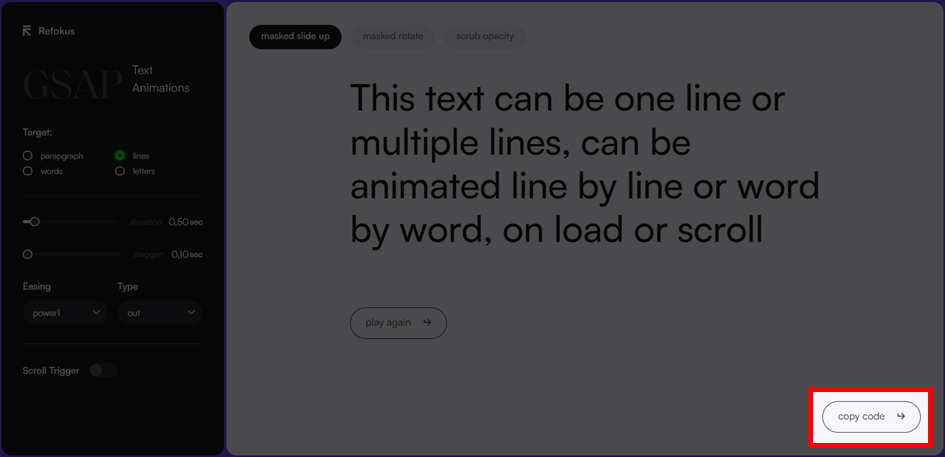
Once you are satisfied with your animation, you can integrate it into Webflow. To do this, copy the code by clicking on “copy code”.
Once the code is in your clipboard, paste it into the « Before body tag » section of your Webflow page settings.
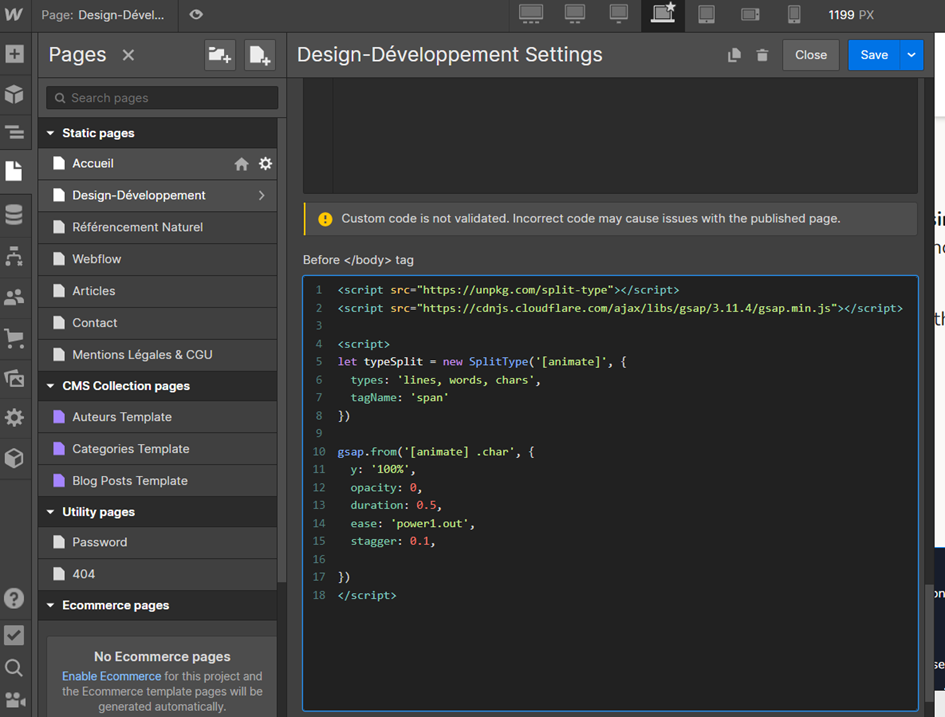
All your text elements with the class « word » or « chars » are now animated using GSAP!
Conclusion
Thanks to the GSAP-text-animator from Refokus, you can animate your text using 3 available options. With JavaScript knowledge, these options become limitless!
If you want to create a sophisticated website that uses advanced GSAP animations throughout your site, contact us!
To learn many Webflow tips, we invite you to check out our Webflow tutorials!

See also our other articles
Let's discuss your needs
Are you looking for a web agency for your project? Contact us and find out how we can help you.